Não sei se o erro do ONVIF e nas minhas cameras ou do meu wifi, so consigo visualizar as imagens e os sensores das cameras se resetar para as configs de fabrica, se por algum motivo ou resetar o HA ou alguma camera, elas perdem as imagens e os sensores das cameras. Alguem ja passou por esses erros?
Bom dia!
Como eu faço pra integrar minhas câmeras MIBO? Não existe uma integração oficial. Tem alguma alternativa?
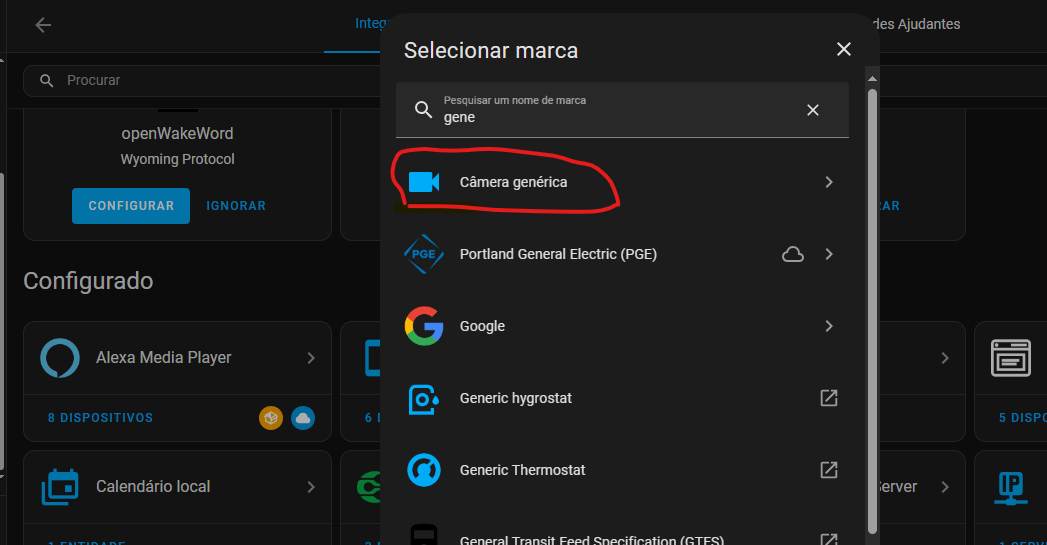
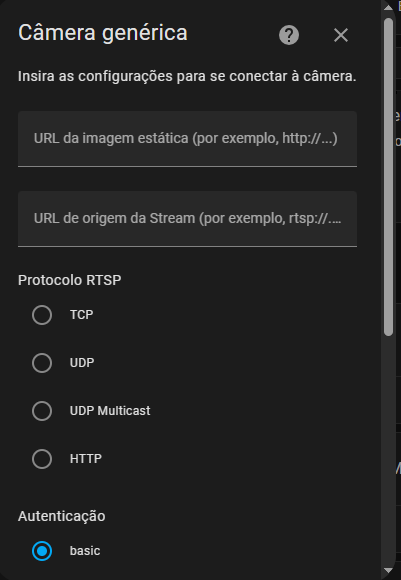
Utilize a opção abaixo. Preencha a segunda URL com o endereço RTSP. Se o RTSP já possuir usuário e senha, não preencha estes campos na parte de baixo. Provavelmente precisará desmarcar a opção de “Verifique o certificado SSL”.
Bom dia!
Não consegui. Coloquei a url correta mas nao aparece a imagem.
Tambem tentem por esse metodo do tópico no forum mas nao aparece a imagem.
usando VLC você consegue ver sua câmera pelo RTSP?
Top. Necessário assinar para todas as cameras? O programa é bom? Não tem video atualizado do programa no YT.
Amigo, algum avanço? Estou com um allo wt7 e queria integrá-lo, mas está parecendo que não dá.
Olá Pessoal,
Alguém tentou e conseguiu integrar o porteiro eletrônico da Intelbras modelo Allo WT7 no HA?
Obrigado

Entendi. Obrigado pela dica.
Excelente, funcionou perfeitamente pra mim, mas sou iniciante no HA e gostaria de saber se é possível identificar movimento nas câmeras com essa forma ou tem mais alguma coisa que precisa ser feita, para conseguir identificar movimento?
Utilizando frigate você terá um mundo de possibilidades.
mas no caso na hora de por o ip da câmera no frigate eu vou por esse link que ele que informa o canal de cada câmera no homeassistant?
O Frigate é um NVR dentro do PC. Então entenda assim, você tem que configurar o NVR com as URLs das câmeras. Depois do NVR configurado, você vai conectar o HA no NVR com integração própria do NVR do HA.
Então, resumindo, você configura as câmeras no frigate, e depois você configura a integração do frigate para usar as câmeras.
Não confie apenas em tutoriais antigos. o Frigate foi muito atualizado recentemente, leia a documentação oficial. Ela é pode parecer complexa no começo, mas depois de acostumar, tudo faz sentido. E é uma das aplicações mais estáveis do HA.
Como exemplo, eu só uso ele como NVR, até desliguei a gravação de meu antigo DVR.
1 curtida
Alguém já fez integração com esse modelo de câmera com lente dupla? Especificamente esse:
Ele tem Onvif então integra no HA.
Teria como ligar a câmera em um monitor?
R: Sim, ONVIF no NVR
1 curtida
@lleonardos @leofig @Rafael123
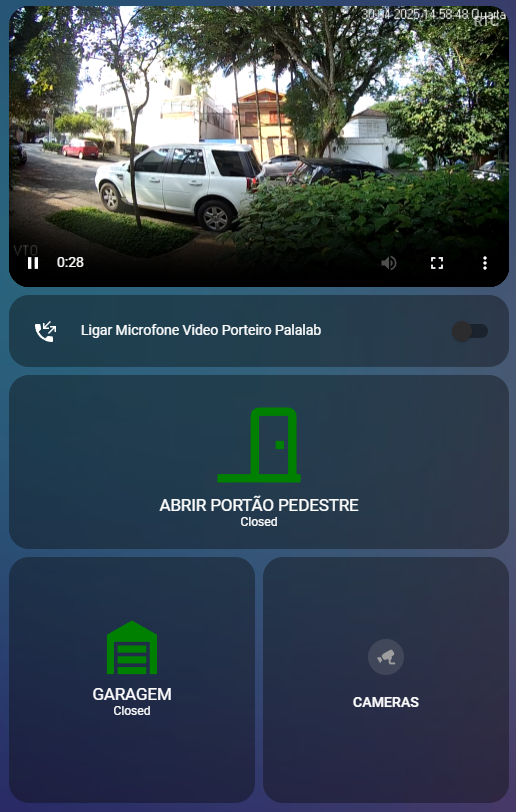
Eu consegui fazer o audio bidirecional (2-way) funcionar em um video porteiro Dahua VTO2201F-P
Segue abaixo minha configuração, desculpem por ser em ingles pois adaptei uma resposta que dei no grupo do HA no Facebook há um tempo:
First, you have to change video codec to H264 using “Dahua Smart PSS” software, so the stream will work in webrtc mode. The audio codec should be PCMA (G711A) or PCMU (G711U).
You also have to access Home Assistant using HTTPS via Nabucasa subscription, Cloudflare or other method.
This doorbell has 2 streams. The first one is SD and the second is HD. If you use the SD stream ONLY for 2-way audio, and you change the audio codec every time this stream is accessed via a bash script (because the codec changes when VTO reboots) , and you do not use the audio of the HD stream in go2rtc, then it will work.
What I did was to create a bash script that changes the audio codec of the SD stream to G711A/8000. Just create this file using file editor addon inside the /config/echo folder, and name it “dahuavto.sh”:
#!/bin/bash
set -euo pipefail
readonly admincreds='admin:pass'
readonly onvifcreds='admin:pass'
readonly host='192.168.2.80'
readonly path='/cam/realmonitor?channel=1&subtype=0&proto=onvif'
params=""
params+="&Encode[0].MainFormat[0].Audio.Compression=G.711A"
params+="&Encode[0].MainFormat[0].Audio.Frequency=8000"
params+="&Encode[0].MainFormat[0].Audio.Bitrate=16"
curl --fail --silent --show-error --digest --globoff --user "${admincreds}" \
"http://${host}/cgi-bin/configManager.cgi?action=setConfig${params}" >&2
echo "rtsp://${onvifcreds}@${host}${path}"
(change “admin:pass” to your VTO user and password, and change “192.168.2.80” to your VTO IP address)
After you create this file, go to HAOS terminal (Advanced SSH & Web Terminal) and paste:
chmod +x /config/echo/dahuavto.sh
This bash script file is called by echo in go2rtc config instead of using the rtsp url.
Use this code below in go2rtc config.
streams:
  sd-audio: echo:/config/echo/dahuavto.sh rtsp://admin:[email protected]/cam/realmonitor?channel=1&subtype=0&unicast=true&proto=Onvif#backchannel=#media=audio
  hd-video: rtsp://admin:[email protected]/cam/realmonitor?channel=1&subtype=1#media=video
webrtc:
  listen: ":8555"
  candidates:
    - stun:8555
(Change username, password and IP again above)
Then you have to forward port 8555 TCP/UDP on your router: Internal port 8555, External port 8555, Internal IP (your home assistant IP), Protocol: TCP and UDP
Then go to Settings > Devices and services > Helpers > create helper > Toggle:
Name: Ligar microfone usuario1
Icon: mdi:phone-incoming-outgoing
Then go to Settings>People>Users and click on your user to copy its ID.
Then go to HACS and install “webRTC Camera”.
Then go to Integrations and add “webRTC Camera” integration.
Then you have to make a new view with 3 cards. Add them as “manual” card and paste the codes below.
The first card is your HD video:
type: custom:webrtc-camera
streams:
url: hd-video
mode: webrtc
media: video
muted: true
The second card is an input_boolean that will be used as a conditional in the last card:
type: entities
entities:
  - entity: input_boolean.ligar_microfone_usuario1
The third and last is a conditional card that, when you press the input boolean, it shows the audio and mic stream and enables two-way audio:
type: conditional
conditions:
  - condition: user
    users:
      - sdffds876fsdf97g679869sadf
  - condition: state
    entity: input_boolean.ligar_microfone_usuario1
    state: "on"
card:
  type: horizontal-stack
  cards:
    - type: markdown
      content: "Tire do mudo para ouvir:"
    - type: custom:webrtc-camera
      streams:
        - url: sd-audio
      mode: webrtc
      media: audio,microphone
      muted: false
Keep in mind that if more than one user turns on 2-way audio at the same time, it will start to delay a lot. So you could create one boolean for each person that only shows on the dashboard for this person (conditional), and create more conditions that this boolean will only show if all other Booleans from other users are off.
I also have some automations that cancels the ring on the VTO and VTH when someone turns on 2-way audio (rroler dahua integration from HACS), and a Telegram snapshot when the button is pressed.
This guy helped me a lot with this config. I see now that he changed his method recently and his setup is a bit different because he does not have a VTH, but is somewhat similar because both configs changes the audio codec using a bash script. His setup is much more complete because he is an expert and uses Frigate, Asterisk, Fully Kiosk and some HA automations, but if you want a simpler configuration, the above is working well for me.
EDIT: Adicionei a parte do webrtc na config do go2rtc, adicionei a informação sobre o redirecionamento da porta 8555 no roteador, adicionei o codec de audio.
2 curtidas
Alguém já conseguiu inserir uma câmera a bateria que fica em estado de dormência?
Por exemplo uma Intelbras IM8?
Olá, alguém tem indicação que já testou de um videoporteiro que integre bem com o HA?
Os requisitos são:
custar menos de 500, incluindo o imposto
desejável:
funcionar em LAN
integrável com o frigate
Vai ter que gastar mais que R$500. Um dos que melhor integram com o HA é o da Reolink. Mas está salgado, principalmente agora que não há loja oficial da Reolink no Aliexpress.
Mas já adianto que o audio bidirecional que é possível configurar pelo frigate e usar no HA, não fica tão bom quanto ao APP oficial.
De qualquer forma, estou muito satisfeito com ele.